Occasionally, Matthew Card will contribute to the Oregonian’s FoodDay section. I really like his features, because they are about eating economically and produce some yummy food. This week, though, in his feature about winter squash, he said he likes the taste of winter squash but “most varieties have crenelated exteriors that make it nearly impossible to peel them while raw, so they must first be roasted, and then the soft flesh scraped free of the skin and pureed.”
To which I say, “Piffle.” Winter squash can be peeled. Is it an athletic event? Yep. Are you sometimes in danger of slicing your hand open? Sure, if you aren’t careful, but the danger can fulfill your sense of adventure. Is it a bit time consuming? A bit, but roasted cubes of squash sans peel are one of my favorite things, and I’m not going to let a little time get in the way of that. Plus, peeling winter squash is something that leaves me with a feeling of great accomplishment. Before there was a hard round object, now, bite-sized pieces of soon to be delicious food.
Here is your step-by-step illustrated process for peeling winter squash. *Note, the steps for butternut squash are a bit different, but I didn’t have one on hand to take a picture of. I’ll go through those verbally at the bottom. Special thanks to my old roommate Mary Kistinger, who saw me about to massacre my own self while peeling a butternut squash and walked me through her technique.
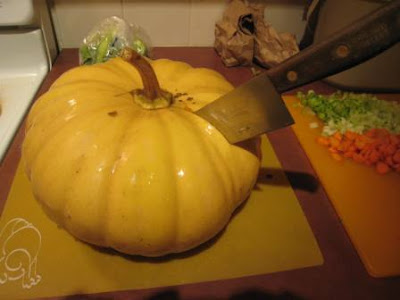
Start with a squash. This Long Island Cheese that I grew is ideal to peel because of it’s smooth surface. Acorn squash is the biggest pain, especially if it has deep ridges. This is a huge squash so the scale is off, but you will get the idea.
 Sharpen your knife. Firmly and carefully plunge the knife into the top of the squash and cut as far down on one side as you can. Rotate the squash around and cut the opposite side the same way. This is one of the steps where you can slice your hand open if you aren’t careful as the skin is a bit thick and sometimes resistant to being cut. Sometimes rocking the knife a bit up and down helps, but keep your other hand out of the way. There aren’t too many times in modern life that you can plunge a knife into something, so enjoy this.
 Flip the squash upside down and plunge the knife in again, pulling it as far down as you can, ideally joining up with the cut you made above. Rotate and do the other side.
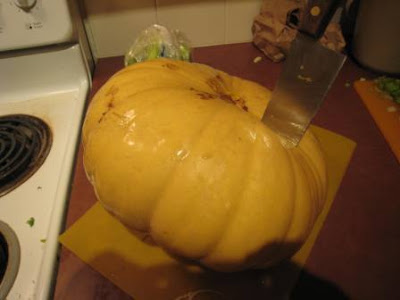 If your lines join up, you shouldn’t have much trouble separating the two halves. In this case, mine didn’t, as evidenced by the ridge on the right-hand side of the picture. The stem was also particularly difficult to crack open. I ended up flipping the whole thing upside down and using the knife as a sort of pry bar to split the two sides from one another. This is also another hand slicing opportunity, so be careful.
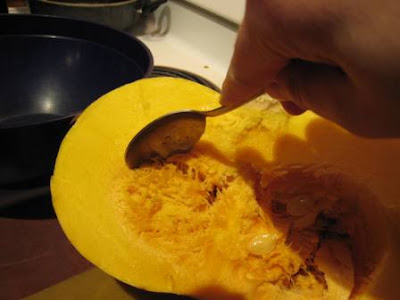
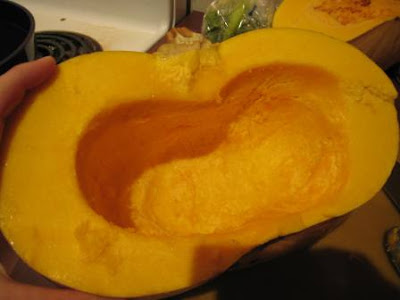
 Scoop out the seeds and other gunky part with a big spoon. This always brings back happy memories of carving pumpkins. Interesting side note. Though we carved pumpkins every year I don’t think I had winter squash in an edible form until I went off to college. I wasn’t a pumpkin pie fan and I think that was the squash-i-est my family got.
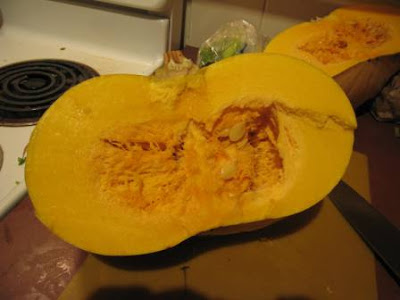
 You are left with the flesh of the squash and, of course, the skin which you now have to remove. This was the first time carving into one of my own squash and I can say that it really does sort of look like cheese.
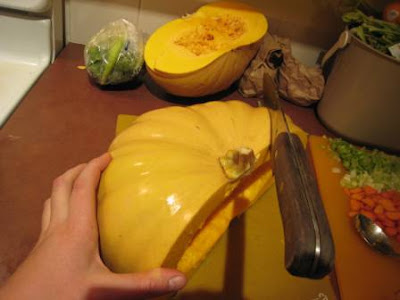
 Set the squash on it’s bottom and carve a wedge off of the half. The size of this squash mandated big slices, but the smaller you cut your slices, the less waste there is.
 At this point, you can cut the whole half into wedges, or do the rest of these steps and then cut another wedge and repeat from here.
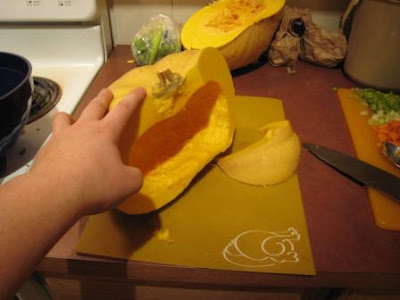 Set you wedge on its side and use your knife to slice off a bit of the skin. I took this photo from the side, but I do this by standing in front of the wedge and leaning over the slice. I always start in the middle and work outward, but I don’t see a reason why you couldn’t start from a side and work around. Keep slicing until you remove all skin. I flip over the squash and get the tiny bits on the other side the knife missed.
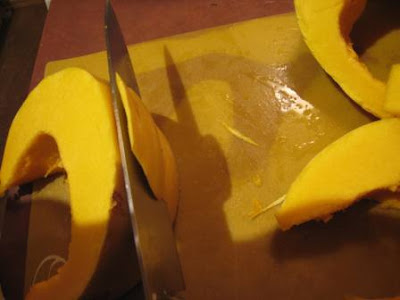 Once the skin is gone, slice the wedge into slices.
 Then take your slices and chop them into the appropriate sized chunks for your recipe.
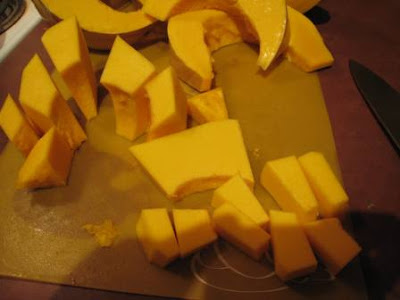 The first time you do this, it might take a long time and you will be very sweaty, but ideally emerge unsliced by a knife. After that, you will become much quicker.
For butternut squash: Cut off the bulbous end. You now have the straight “top”side. Cut off the stem end. Stand this end upright (it will look like Devils Tower) and slice off the skin around the tower. You can then slice this tower of squash into what every you would like. Then cut the bulbous part in half and continue as above.
Easy roasted winter squash recipe gleaned from the FoodDay’s feature on roasting winter vegetables:
Preheat oven to 425 degrees.
Throw 2.5 lbs of squash [this is flexible, don’t stress if you have a bit more or less] cut into two-inch pieces in a bowl. Drizzle in 2 T olive oil, salt and pepper and toss. Put on baking sheet or in 9X13 pan. Sprinkle 2 teaspoons fresh chopped thyme over the top. Roast for 40 minutes, stirring a bit halfway through.


